Organizations must balance multiple complex projects that require the timely completion of tasks in a specific sequence. For project managers and business leaders, the ability to analyze, develop, and manage a project’s schedule is a cornerstone of success. A well-crafted project timeline can serve as a strategic asset, visualizing the path to completion, providing critical transparency for stakeholders, and empowering managers to anticipate and mitigate issues before they arise.
This guide covers the fundamentals of project timelines and examines the strategic application of project management timelines. We will delve into the key visualization tools and provide detailed examples of project timelines.
In this post, you’ll learn:
What is a project timeline?
A project timeline is a project management tool designed to help visualize tasks in chronological order. It’s most often presented in the form of a horizontal bar chart. Timelines enable project managers to view all functions required for a particular project in one place, ensuring they maintain visibility over the dates and targets for all work sets.
A project timeline lists all relevant tasks associated with a project, organized by their designated start and end dates. These project management tools show which phases of work have been completed, which are currently in progress, and what needs to be done before the project’s final deadline.
By making it possible to visualize all tasks included in a project, timelines ensure that managers never lose sight of essential tasks or their beginning and end dates.
Types of project timelines.
PERT charts vs. Gantt charts.
There are two primary tools used to visualize project timelines: Gantt charts and PERT charts. The value of each depends on the intended use case.
A Gantt chart consists of several horizontal lines, each representing a specific task. These lines indicate the amount of work your team has completed and reveal how long it took to finish each task event. When that task is finished, a new line is created below and to the right of the previous one. Dates and days of the week are usually located at the top of a Gantt chart. Gantt charts are the ideal tool for tracking progress against a calendar, managing resources, and communicating project schedules to stakeholders in a clear format. Gantt charts can display task dependencies, typically represented by lines or arrows that link the bars of related tasks.
A Program Evaluation and Review Technique (PERT) chart is a project management tool that utilizes nodes (represented by circles or boxes) to signify project tasks or milestones, and direct arrows to illustrate the dependencies between them. PERT charts are like Gantt charts. However, they don’t have to maintain a linear layout. Instead, they can be displayed as a free-flowing diagram. Each task or “node” is connected to past and future milestones via arrows. The PERT chart’s primary strength is its ability to visualize complex logical relationships and inter-task dependencies.
To see the differences between Gantt and PERT Charts, review the table below:
Critical path method.
The critical path method (CPM) is a project management process that identifies key activities in a process and evaluates the time each task will take. The CPM estimates the duration required to complete a project and identifies the tasks that must be completed to meet the deadline. The critical path method has the following steps:
- Activity Identification
- Establish a sequence
- Create a network diagram
- Estimate completion time
- Identify the critical path
Elements of the project timeline.

You must include several critical features in the visual tool you use to create a project timeline. You can add valuable elements based on an individual project’s needs, but the following are part of many project timelines:
- Tasks to be completed: Keep tasks specific and focused when segmenting them. Once you’ve identified all the functions associated with your project, add them to your timeline. Ensure that each task title is concise and clear. There’s no need to provide an extensive explanation of a task’s scope on your timeline — doing so only wastes time and makes the chart needlessly complicated.
- Start and end dates of tasks: Avoid getting too granular by including end times. Instead, keep things simple by identifying a precise start date and an end date. While you shouldn’t be overly ambitious with your start and end dates, choose time frames that are bold enough to create a sense of urgency for your team.
- Duration of each task: Project timelines are intended to convey essential task details concisely. With that in mind, make it a point to list the estimated duration of each task. For instance, one task may have a projected duration of three days. A more involved one may take nine days to complete.
- Task dependencies: Dependencies are other tasks that must be completed before you can move on to the next piece of work. Early in your project, most tasks will have few, if any, dependencies. But as you progress, most end-of-cycle tasks will have one or more dependencies.
Other elements to consider in your project timeline include listing the number of team members assigned to each task. Some project leaders prefer to avoid getting too specific with their timelines, though, as doing so can confound decision-making processes and lead to information overload.
8 steps to create a project timeline.

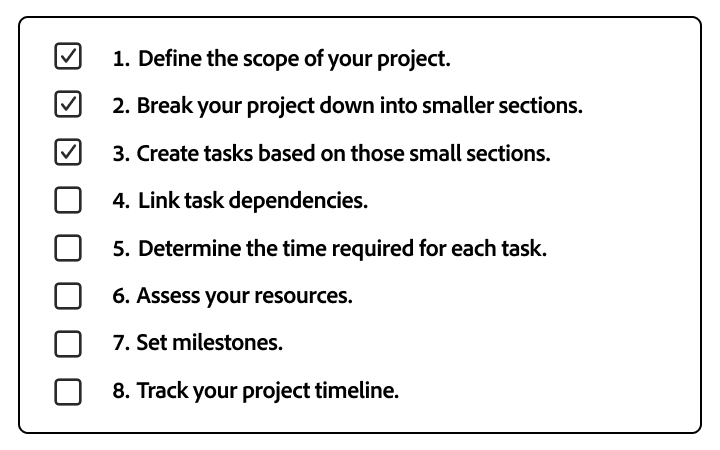
To begin using project timelines to visualize key tasks and support project managers, follow these eight steps to create project timelines efficiently. These eight steps can be applied to create a project timeline across various industries, such as software development or marketing.
1. Define a project’s scope.
Before you can begin identifying specific tasks or creating your project timeline, you must first define the scope of your project. The project scope should outline core objectives and goals so that managers understand exactly what’s expected of them when the project gets underway. Defining a project's overall deliverables, tasks, dependencies, and budget is valuable to set a project up for success.
2. Break a project into small sections.
A project timeline helps your team examine a large project at a more granular level. That means you need to break your project down into smaller components. Using construction as an example, your sections might include building an asset’s exterior walls, installing infrastructure, and other related tasks.
3. Create subtasks based on small sections.
Once you’ve divided your project into smaller sections, start forming several tasks for each section. If a task is still projected to take a month or more to complete, consider segmenting it further to keep each piece of work manageable. For example, instead of listing “install infrastructure” as a single task, you might break this section down into three or more subtasks, such as installing electrical, HVAC, and plumbing systems.
4. Link task dependencies.
Managers may lose sight of otherwise obvious dependencies during the mad dash to complete a project. Link task dependencies together to help teams stay aware of what tasks must be completed before others can begin. Keeping with the construction example, you could link tasks, such as installing structural walls, to dependencies like pouring the foundation.
5. Determine the time required by the task.
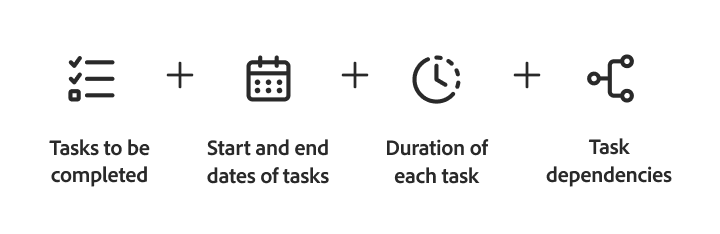
Create accurate time estimations for each task and ensure they are spaced out accordingly on your horizontal project timeline, PERT or Gantt chart. It is helpful to discuss potential dependencies with your project teams. Additionally, you should revisit the time required for each task to assess how the time per task can be reduced without sacrificing quality.
6. Assess available resources.
You’ll need to assess the strengths and weaknesses of the project team. Spending the time to complete this process thoroughly will help you set appropriate milestones and support the success of your project. Finding ways to simplify or automate processes can help project teams make a greater impact with limited resources.
7. Set sequential milestones.
Milestones are used to denote the end of a significant phase of work and the start of the next one. Set a milestone for each critical task sequence or deliverable. When you reach a milestone, take a moment to meet with your team and gather feedback on the project. Additionally, changes or adjustments may be required after a project begins. It’s essential to adjust a project timeline in response to unforeseen circumstances, such as a sudden change in resources.
8. Track project timeline.
Once work begins, refer to your project timeline regularly to ensure your team stays on track. Monitor each team member’s workload, keep a close eye on resource allocation and availability, and quickly respond to any bottlenecks that may cause you to miss important deadlines. Setting applicable key performance indicators (KPIs) to assess a project’s impact is crucial to get buy-in from stakeholders.
Project timeline examples
The principles of project timelines are relevant for a wide range of industries. Understanding how to structure a timeline for various types of projects is crucial to effective project management. The following examples demonstrate how timelines are customized to meet the unique needs of a specific industry.

Software development project timeline.
Scenario: The project involves launching a new feature for an existing mobile application. This timeline blends the structured phases of a traditional waterfall model with the iterative nature of Agile development.
A Gantt-style chart is highly effective for this scenario, as it can visually represent the overarching phases and the discrete time boxes for each development sprint. Dependency mapping is critical for ensuring major milestones, such as design approval, are met before dependent work, like sprint planning, can commence.
- Phase 1: Discovery & Planning: This initial phase focuses on defining the project's foundation. Tasks include gathering stakeholder requirements, creating a detailed project scope statement, and developing a high-level system architecture.
- Phase 2: Design: The design team takes the lead, creating UI/UX mockups, wireframes, and a clickable prototype to visualize the final product and gather user feedback before any code is written.
- Phase 3: Development Sprints: The core development work is broken down into a series of time-boxed sprints, each typically lasting two weeks. Each sprint includes its micro-timeline, consisting of sprint planning, daily stand-up meetings, development work, and a sprint review to demonstrate progress.
- Phase 4: Quality Assurance & Testing: A dedicated phase for rigorous testing ensures the feature is robust and bug-free. This includes unit testing, integration testing to ensure the new feature works with the existing app, and user acceptance testing (UAT) with a select group of end-users.
- Phase 5: Deployment & Launch: The final phase involves setting up the production environment, deploying the new code, and conducting post-launch monitoring to address any unforeseen project issues quickly.
Marketing project timeline.
Marketing project timelines can be utilized for various purposes. One common approach involves using project timelines to map out a customer’s journey as they progress through the purchasing funnel.
The beginning of the timeline can focus on the awareness phase and list tasks associated with generating interest in a product, such as launching a paid advertising campaign. Towards the end of the timeline, project leaders can list tasks such as filling out a contact form or signing up for a mailing list.
Alternatively, marketing project timelines could be used to guide the creation and launch of new campaigns. Such a project timeline would likely include tasks like:
- Creating campaign content like blogs or videos
- Testing various content options
- Publishing and promoting content
- Measuring results
- Modifying the campaign
Since multiple tasks may be performed simultaneously, most marketers would likely benefit from a nonlinear chart such as the PERT. If you specialize in a single type of brand building, such as PPC campaign management, a Gantt-style chart is a valuable tool to use.
Unify project timelines and strategy with Workfront.
Incorporating project timelines into a management framework enables organizations to visualize every detail of a project in chronological order, keeping teams on track and aligned with strategic goals. As you prepare to integrate these powerful tools, it is essential to consider whether your current platform can meet the demands of modern project management.
Workfront provides comprehensive project planning capabilities, including interactive Gantt charts and dependency mapping, while enabling the dynamic, real-time, KPI-driven project tracking required by today's leading enterprises. It provides a unified environment where timelines are live, communication is seamless, and data-driven decisions are the norm, connecting the "why" of your strategy to the "how" of your team's daily work.
Watch the overview video to learn more about how Workfront can transform your project management capabilities.
Recommended for you
https://business.adobe.com/fragments/resources/cards/thank-you-collections/workfront